
Add a participant
Background#
The term “Participant” refers to a study participant who wears the sensor. When you create a participant, the data the sensor records during that participant’s measurement period is associated with them. This means the same sensor can be reused for other participants in other periods.
How to add a new participant#
Log on to the web app.
Click Projects in the top menu.

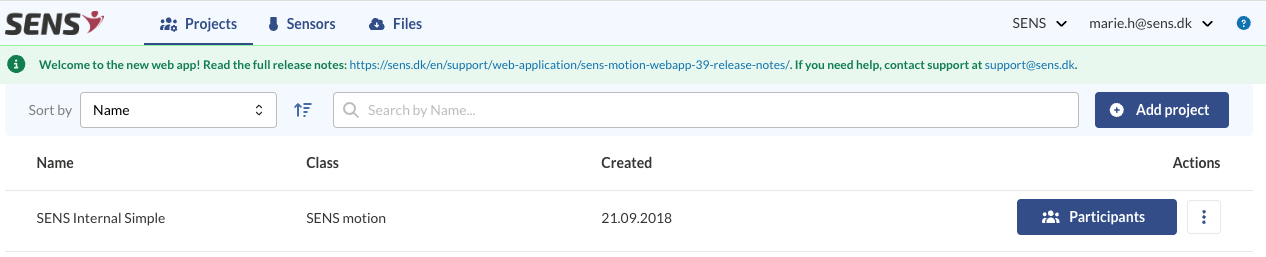
- Find the project you want to add the participant to, and click Participants on that project’s row. The Participants overview opens.
- Click Add participant. You can do this from both the Setup View and Monitoring View tabs.

- Fill in the Add Participant form.
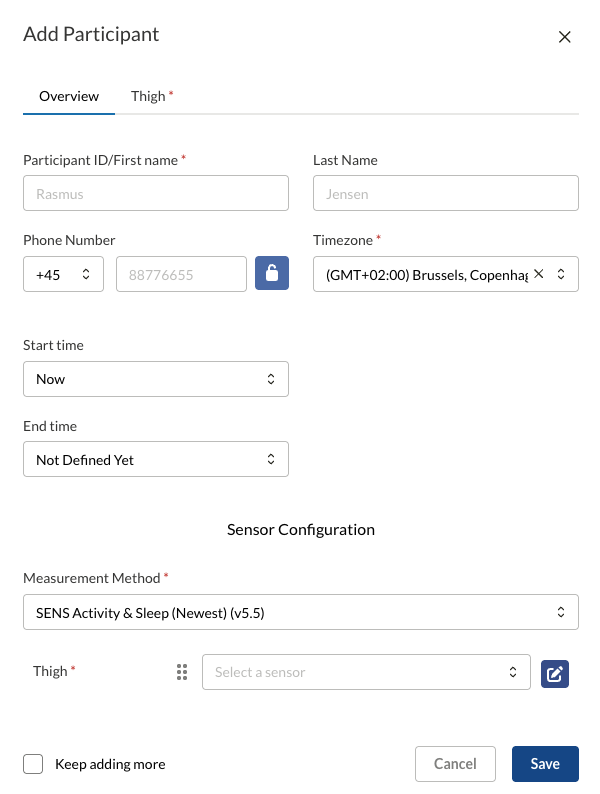
Fields marked with a red star (*) are required.
- Participant ID/First name — enter a participant ID or first name. The participant ID does not have to contain personally identifiable information.
- Last Name and Phone Number — optional.
- Timezone — the timezone the participant is measured in. If the project has a default timezone, it is filled in for you. Check that it is correct for the participant.
Start time and End time set the period to be measured.
For start and end time, there are three options: Now, Specific Time and Not Defined Yet. For the end time, you can also choose Specify Duration. Note that you cannot set an end time if Not Defined Yet is selected as the start time.
You can always subsequently adjust the start and end time of the monitor period. Data will be stored on the sensor as long as it is running and adjusting the monitor period will not impact the stored data.
Under Sensor Configuration:
- Measurement Method — the algorithm used to analyse the data. The project’s default measurement method is pre-selected, for example SENS Activity & Sleep (Newest). Keep it unless otherwise agreed.
- Thigh — the sensor the participant will wear on the thigh. The sensor ID is on the sensor label.
You can choose the sensor in two ways:
- Click Select a sensor and pick the sensor from the dropdown list. You can search by sensor ID.
- For more information about each sensor, click the blue edit button next to the dropdown, or use the Thigh tab at the top of the form instead. This opens the full sensor list:
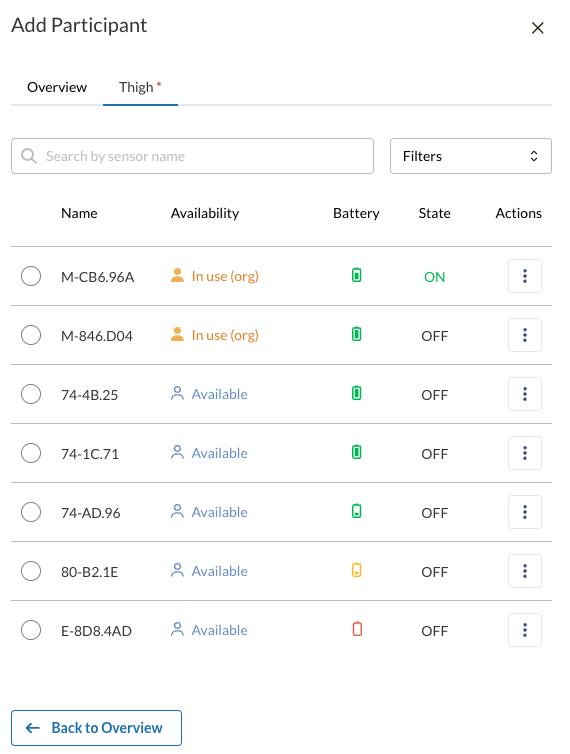
The list shows for each sensor:
- Name — the sensor ID.
- Availability — whether the sensor is already used by another participant:
- Available — the sensor is not used by any other participant.
- In use (org) (orange) — the sensor is used by a participant in another project in your organisation. This is normal when you reuse sensors for a new project.
- In use (project) (orange) — the sensor is used by another participant in the same project. You should most likely not choose this sensor for the new participant. If you do, and the participants’ start and end times overlap, the same sensor data is logged under both participants, even though only one of them can wear the sensor at a time.
- Battery — the battery level.
- State — whether the sensor is ON or OFF.
- Actions — open the menu (three dots) to Turn sensor on or Turn sensor off directly from the list. Cancel pending cancels an on/off request that has not yet reached the sensor.
Use the search field or Filters to find a sensor. Click the circle in front of the sensor to select it, then click Back to Overview to return to the rest of the form.
- Click Save. You have now added a participant.
If you want to add several similar participants, tick Keep adding more before you click Save. A new form then opens, pre-filled with the same measurement method and time period, so you only need to enter the participant details and choose a sensor.
Follow this guide on how to assemble and position the patch on the participant.
How to create a participant based on an existing one#
If the new participant is similar to one you have already created, you can duplicate the existing participant instead of filling in the form from scratch.
- Click the menu (the three dots) under Actions on the row of the participant you want to copy, and select Duplicate participant.
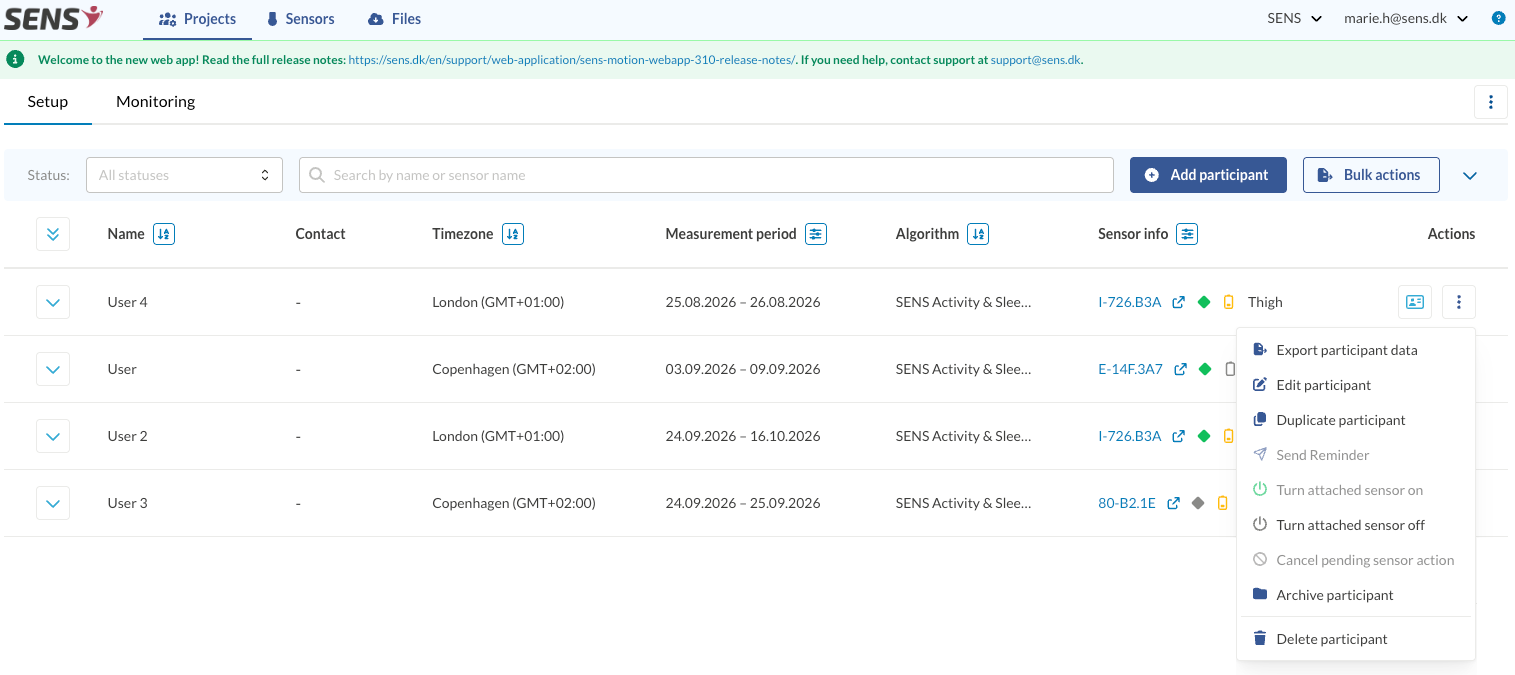
A new form opens, pre-filled with the participant’s information. Change the information that should be different, for example the participant ID and sensor.
Click Save.